Welcome to the new era of data! You probably recall the era of Goals in Universal Analytics (UA), should you have been on the platform long enough using digital analytics. But by the year 2026, the situation has changed completely. It is no longer necessary to track user interaction with your site as a nice-to-have, and it is the foundation of any successful digital strategy. Without right conversion tracking, you are at literally flying in the dark and do not know which of the marketing activities is making money flow into the bank.
The shift to UA to Google analytics 4 (GA4) was accompanied by a fundamental change in the way data is being processed. GA4 is more dynamic and powerful, yet needs a slight change of mindset. Here, we will step by step set up and track conversions (also known as Key Events) in this guide. You may be a conversion expert or a beginner , nonetheless this practical guide will put you on top of the fundamentals in order to get down to what counts, building your business.
What Are Conversions in GA4?
In the simplest terms, a conversion is any action a user takes on your website that is valuable to your business. In the old days of UA, you’d set these up as “Goals” based on specific URLs. GA4 does things differently, it is entirely event-based.
Understanding the Hierarchy
In GA4, every single interaction is an Event.
- Events: These are the raw building blocks. A page view, a scroll, or a button click are all events.
- Key Events (formerly Conversions): These are the “VIP” events. You choose which specific events are important enough to be labeled as a Key Event.
Examples of common conversions include:
- Form Submissions: When someone contacts you or requests a quote.
- Purchases: The ultimate macro-conversion for e-commerce.
- Newsletter Signups: A great way to track early-stage interest.
- Button Clicks: Such as “Download Whitepaper” or “Start Free Trial.”
By moving to an event-based model, GA4 allows you to see the entire journey, not just the final destination.
How GA4 Tracks Data (The Basics)
Before jumping into the setup, you need to understand the four types of events in GA4. Think of events as the “language” your website uses to talk to Google.
- Automatically Collected Events: GA4 tracks basic things like first_visit and session_start the moment you install the code.
- Enhanced Measurement Events: These are “plug-and-play” events you can toggle on in your settings, covering scrolls, outbound clicks, and site search.
- Recommended Events: Google has a specific list of names (like generate_lead or add_to_cart) it wants you to use. Using these names unlocks better automated reporting.
- Custom Events: These are events you define yourself when the standard ones don’t quite fit your needs.
Understanding this flow is crucial because you cannot track a conversion unless an event is being sent to GA4 first.
Step 1: Install GA4 Properly (Foundation Step)
Before tracking conversions, GA4 must be correctly installed on your website. If this step is wrong, nothing else will work. We’re talking about Google Analytics 4 and it must be connected to your site using the correct Measurement ID.
Option A: Install Using Google Tag (Direct Method)
This is the easiest method.
Step-by-step:
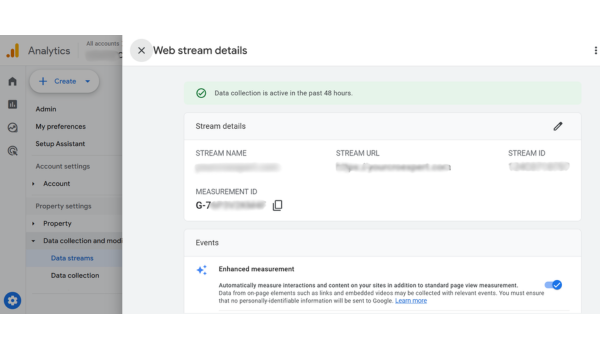
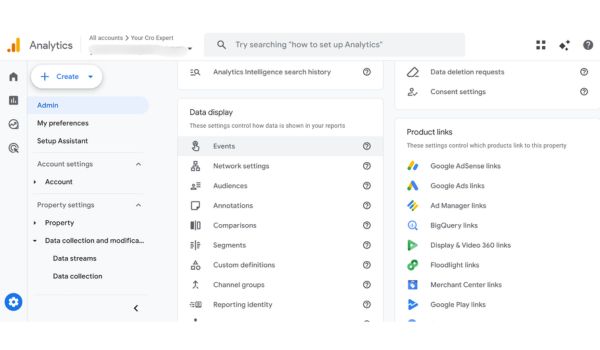
- Go to analytics.google.com
- Click Admin
- Under Property → Click Data Streams
- Select your website stream
- Copy your Measurement ID (looks like G-XXXXXXXX)
Now:
- Click “View tag instructions”
- Copy the Global Site Tag (gtag.js)
- Paste it inside the <head> section of your website
If you’re using:
- WordPress → Use header plugin or theme settings
- Shopify → Add it in theme.liquid before </head>
Save and publish.
Option B: Install Using Google Tag Manager (Recommended)
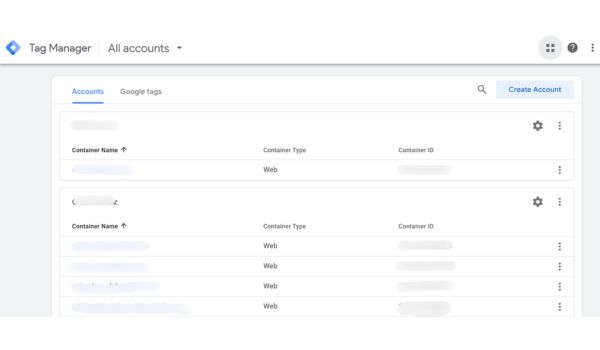
If you want flexibility and advanced tracking, use Google Tag Manager.
Steps:
- Login to tagmanager.google.com
- Click Add New Tag
- Choose: GA4 Configuration
- Paste your Measurement ID
- Set Trigger → All Pages
- Click Save
- Click Submit → Publish
How to Confirm Installation Is Working
After installing:
- Open GA4
- Go to Reports → Realtime
- Open your website in another tab
- Browse your site
If you see yourself active in Realtime → Installation is correct.
If not:
- Check Measurement ID
- Make sure GTM container is published
- Clear browser cache
- Disable ad blockers
Once this works, move to Step 2.
Step 2: Create or Identify the Event You Want to Track
Remember: In GA4, everything is an event. Before marking a conversion, you need the correct event firing
First: Decide What You Want to Track
Ask yourself:
- Do I want to track form submissions?
- Purchases?
- Button clicks?
- Thank-you page visits?
- Phone call clicks?
Be specific.
Example:
Instead of “track leads,” say:
“I want to track when someone submits my contact form.”
Option A: Check If the Event Already Exists
Go to: Admin → Events
Look for events like:
- purchase
- generate_lead
- add_to_cart
- page_view
- click
If your desired action already appears, great.
If not, you must create it.
Option B: Create a Custom Event (Without Coding)

Let’s say your form redirects users to thank you page of your website or any relevant page. You can track that easily.
Steps:
- Go to Admin
- Click Events
- Click Create Event
- Click Create
- Name your event (example: generate_lead)
- Under Matching Conditions:
- event_name equals page_view
- page_location contains thank-you
- event_name equals page_view
- Click Save
Now whenever someone lands on the thank-you page, the event fires.
Alternative: Track Button Click (Using GTM)
If the form doesn’t redirect to a thank-you page, you’ll need Google Tag Manager.
Steps inside GTM:
- Enable Click Variables
- Create Trigger → Click – All Elements
- Set condition: Click Text equals “Submit” (or your button text)
- Create GA4 Event Tag
- Event name: generate_lead
- Attach trigger
- Publish
Test it using Preview Mode before publishing.
How to Confirm Event Is Firing

Go to: GA4 → Configure → DebugView
Perform the action on your website.
If you see your custom event appear, success. If not:
- Check event name spelling
- Make sure conditions are correct
- Ensure GTM is published
Only move to Step 3 once your event is firing correctly.
Step 3: Mark the Event as a Conversion
This is the most important step. Creating an event does NOT automatically make it a conversion. You must manually mark it.
Method 1: From Events Section
- Go to Admin
- Click Events
- Find your event
- Toggle ON “Mark as conversion”
Done.
Method 2: Manually Add Conversion
If event already exists but not listed:
- Go to Admin
- Click Conversions
- Click New Conversion Event
- Type the exact event name
- Click Save
Spelling must match exactly.
Example:
If your event is generate_lead
Typing Generate_Lead will NOT work.
Important Note
Conversions start tracking from the moment you mark them.
GA4 does NOT track past data retroactively.
That’s why setting it up correctly from the start is important.
Step 4: Test and Verify Everything Works
Never skip testing.
Even professionals test every time.
Test Using Realtime Report
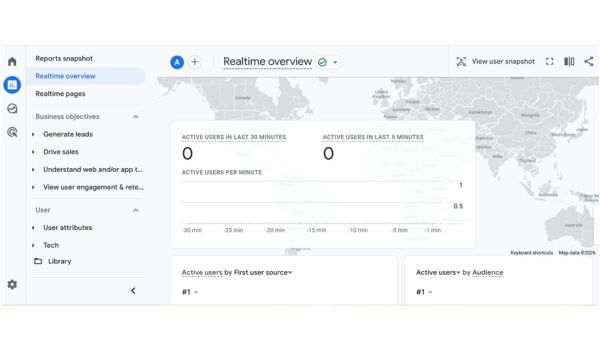
- Open GA4
- Go to Reports → Realtime
- Perform your conversion action
- Submit form
- Make test purchase
- Click tracked button
- Submit form
Check if:
- Event appears
- Conversion appears
Test Using DebugView (Advanced Testing)
- Enable GTM Preview Mode (if using GTM)
- Open DebugView in GA4
- Perform action
- Look for your event in timeline
DebugView shows detailed event data.
Advanced Tips: Track Conversions Like a Pro
Ready to take it to the next level? Follow these “pro” rules:
- Use Recommended Names: Stick to names like purchase or sign_up. This allows GA4’s AI to better understand your data.
- Set Up Funnels: Use the Explore section to create “Funnel explorations.” This shows you where users are dropping off before they convert. For a deep dive on this, check out our CRO guide for 2026.
- Assign Values: Even for leads, assign a “placeholder” value (e.g., $10). This helps you calculate ROI later.
- Link with Google Ads: This is crucial. By linking GA4 to Ads, you can import your Key Events to optimize your bidding strategies.
- Micro vs. Macro: Track “Macro” conversions (sales) and “Micro” conversions (video views, scroll depth) to see the full picture. Understanding the interplay between these is a key part of how to use GA4 for advanced analytics in CRO.
Common GA4 Conversion Tracking Mistakes
Even experts make mistakes. Watch out for these:
- Case Sensitivity: Generate_Lead is not the same as generate_lead.
- Duplicate Tracking: Firing an event in GTM and creating it in the GA4 interface.
- Ignoring Parameters: Forgetting to track which form was submitted or which button was clicked.
- The “Waiting Game”: Thinking the data is broken because it doesn’t show up in standard reports immediately (remember the 24-hour rule).
Real-World Example
Imagine a local bakery that wants to track “Cake Inquiry” forms. They set up a custom event named cake_inquiry that fires when a user hits the /thank-you-cake page. By marking this as a Key Event, they realized that most of their leads were coming from mobile users on Instagram, not desktop users from Google Search. This allowed them to shift their ad budget, resulting in a 30% increase in inquiries within a month. Simple tracking, massive results.
Conclusion
Setting up conversion tracking in GA4 might feel like learning a new language, but it’s the most important skill you can develop for your website’s success. By following these steps, installing correctly, creating events, marking them as key events, and testing, you’re turning raw data into a roadmap for growth.
Start by picking your one most important action (usually a purchase or a lead form) and get that tracking perfectly today. Once you understand how events work, GA4 becomes an incredibly powerful ally.